For a large portion of my career I’ve had the privilege of teaching multiple college undergraduate design courses, and it is something I truly enjoy. It’s an opportunity to not only share my own knowledge and work experience with the next group of industry professionals but to also continue to hone my own skills. I firmly believe that the best way to keep learning is to teach someone else. This forces us to go back and re-evaluate concepts we may take for granted, and in some cases introduce ourselves to new ones that both the student and professor can benefit from.
The applications and techniques I’ve been teaching, while centered around a core design discipline, have been primarily focused on motion graphics, animation, and video and include Adobe Flash and After Effects, both the Creative Cloud versions. The latest iteration of After Effects is really pushing new boundaries and is probably my favorite application to date.
I firmly believe that the best way to keep learning is to teach someone else.
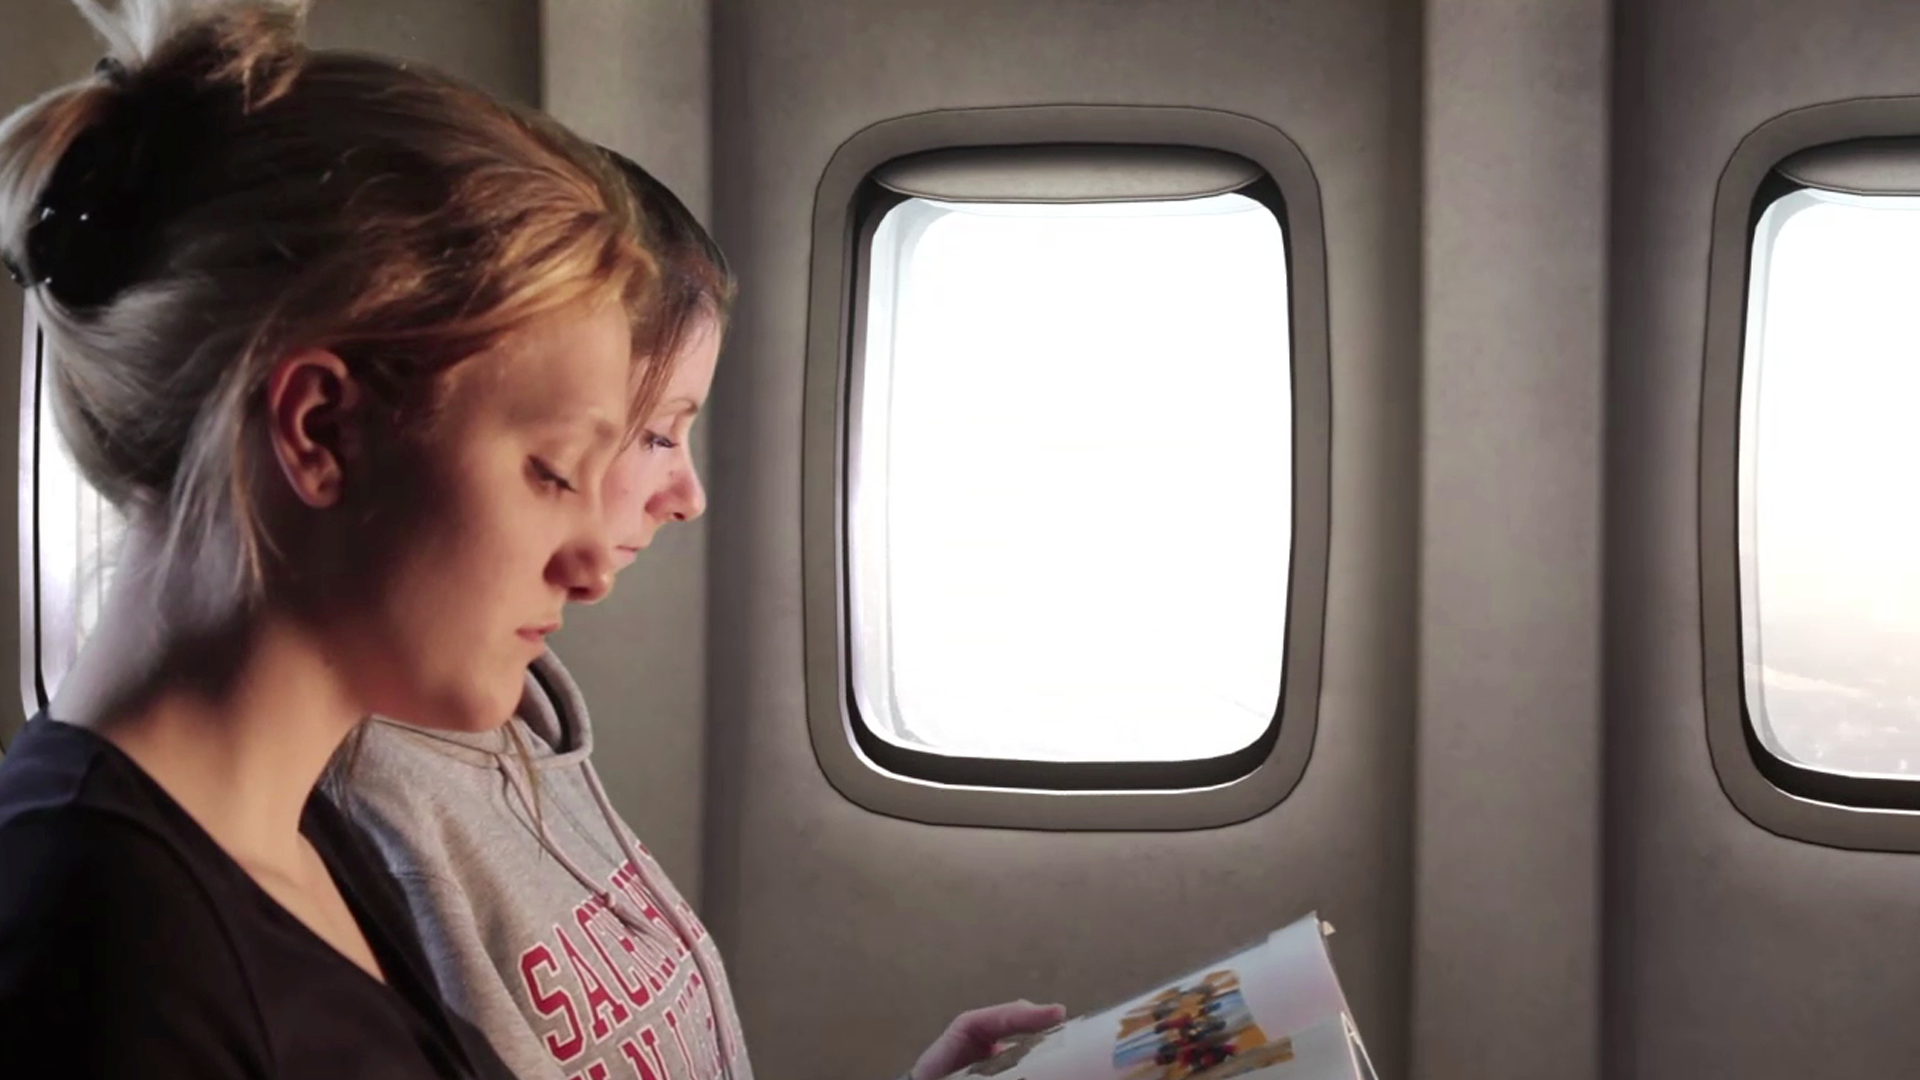
The senior design students at Sacred Heart University who are enrolled in my After Effects course have the opportunity to participate as both crew and actor in a video shoot at the end of the semester. And for the past several semesters we have based our shoot on a tutorial that was original created by the folks over at VideoCopilot.net. The tutorial called “Mid-Air Emergency”, features several would be actors set against a green screen, whom will later be composited against a simulated commercial jet interior. Unfortunately for these actors, their “simulated” jet is about to have a few mechanical problems.
What’s life without a little excitement?
This particular tutorial has become a favorite because it combines a relatively simple camera setup, quick recording, single take, with two people that – with the most modest ability to imagine you are sitting on a plane – can recreate the performance and integrate said recorded footage into the final scene. Andrew Kramer, of VideoCopilot was generous enough to post the assets for the tutorial, which gives us a great head start allowing us to quickly dive into the core exercise.
I always preface my announcement to the students with the disclaimer “Please see me if you have any concerns about participating”. I certainly don’t want to torture some poor student who has a particular fear of flying – despite their feet never leaving the Earth, we don’t need anyone blacking out in the middle of the exercise. But since our class is all about making things “seem real”, with all of these magical tools at our disposal, it was the perfect opportunity to make good on my promise, “by the end of the semester, we’re gonna blow some stuff up”.
The shoot
We take over one of the classrooms in the department, and convert it temporarily into a studio. The setup is fairly straight forward. Lighting is always a challenge with green screen work. If you don’t have a nice even lighting on the green background, you’re in for a world of hurt later on. Luckily the area that was filmed was not quite as wrinkled as the majority of the fabric, and the 1×1 Cool Lights that we used with diffusion panels did the trick.

Referencing the final scene I setup two lights on either side of the actors. A warmer tungsten work lamp was set facing the pair to create a bit of a “sunset” effect that would sync well with the proposed sky background. The daylight calibrated 1×1 was used behind to provide some cross lighting, that we can only assume was passing through the other windows on the airliner.
I didn’t want to bring in gear that was over the top, and unaccessible to the students should they choose to continue with their own projects outside of school. The video was taken on a Cannon 60D with a Sigma 35mm prime set at f4, which helped soften the background just enough, while keeping the overall move in focus.
The dolly move was achieved by using 2 parallel PVC pipes and a home grown dolly rig. There are a large number of tutorials online on how you can build your own. I’ve always been a fan of the guys at Indy Mogul for their “home grown” solutions. My camera is mounted on a Konova Slider that, in this case, is simply acting as a jib arm. The slider itself doesn’t have the range need to achieve the kind of push we need, so we’re using the main track with a stationary rig. And yes, that is a book being used as a counter-weight. Hey, that’s all those large stock illustration books are good for now anyway!
The key came out pretty clean, despite the inconsistencies in the surface. I was actually more surprised by the challenges I had using After Effect’s built in Camera Tracker to resolve the camera move. Apparently, the black dots against the green don’t register too well – and I think this is the result of the tracker algorithm looking for areas of high-contrast. Next time I will place black and white tracking dots in place instead. What would we do without Keylight, still magical every time.
Up, Up and Away!
In order to achieve the custom shot of the airliner before and after it’s mechanical problems, I employed another set of tools from Video Copilot and that is their fantastic Element 3D plugin. If you don’t have this in your arsenal, you should. The recently introduced CineWare plugin has opened up the world of live 3D integration into After Effects natively. But it’s not quite the same. It’s incredibly slow, and for the kind of animation I want to achieve, Element 3D does a fantastic job quickly and seamlessly.

Video Copliot also offers a Jet Strike add-on which provides you with a fairly comprehensive library of fully rigged military planes, and commercial jets (pictured above), all of which can be graphically customized to suit your needs. If I had wanted to, I could have updated the skin on the closing animation to included a charred and fire damaged wing – alas I ran out of time.
The scene with the jet is only comprised of a handful of layers, including a couple of key lights, a static sky background, the jet model and a few cloud particle effects. Add a slight bit of camera wiggle and you have a very natural looking shot.
Final assembly came together using the tutorials included interior backgrounds and wing elements and demonstrated to the students how you can build a pretty compelling scene with just a few graphics and pre-keyed smoke elements.
Some color grading and manipulation of the various layers, including quite a few process effects such as glow, curves, and saturation adjustment layers help to bring some cohesion to the separate pieces.
In the end the students had a really great time, escaping the rows of computers in the lab and my endless banter on motion graphics techniques and overt enthusiasm for special effects. The end results brought an equal amount of smiles and terror as they were excited to see what they were able to do with their own footage, and continually scrutinizing their on screen performance. Maybe this quick glimpse will spark a career shift, but for now I’ll settle for the smiles.